In the past, I’ve had some pretty bad hair color experiences. When I was a teenager, I went to a hairdresser who used permanent red hair dye on me. Yes, I wanted to go red, but not FOREVER! Needless to say, it was not easy to transition out of that color. He ended up coloring my hair a dark black to cover the red, but it just kept popping through. I ultimately just had to wait for the color to grow out to be completely gone. So fast-forward to working with Jeffrey on my hair color journey and its a totally different experience. He has taught me the value in planning ahead when it comes to hair color. You have to PLAN! You can’t expect to go from brown to bleach blonde in one service and you can’t expect to go from blue to pink in one service either. Everyone’s hair is different and every type of hair takes on color differently, but for drastic color changes, you have to be prepared to need a few services to get to your end goal.
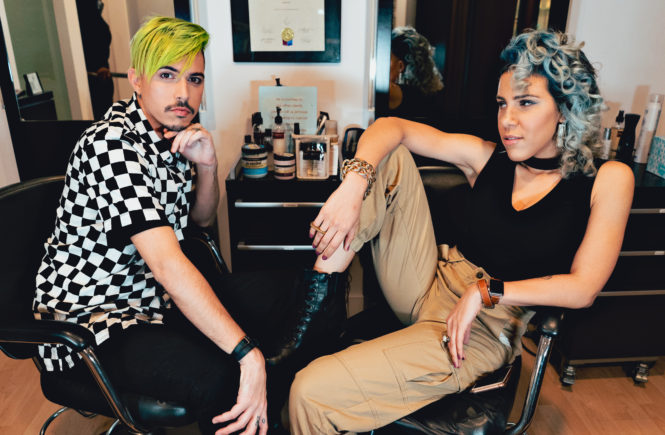
Jeffrey is no stranger to big hair color transitions on himself as well!
Jeffrey’s Pro Tips for Transitioning Hair Color
When it comes to transitioning your hair throughout the seasons, it’s important to talk to your stylist about the ideas and goals you may have. If you know that you want to be a platinum blonde for the upcoming summer, this might potentially change how we approach the application of your darker color for the previous winter. Planning out or gradually transitioning your look is beneficial for various reasons including cost efficiency, time spent in the salon and most importantly, the integrity of the hair.
It’s always important to share your hair goals going forward with your stylist. Having photos to show them is a simple yet effective way to communicate visually and understand what goes into creating and maintaining each look. It may be necessary to change your at-home haircare routine in preparation for the upcoming chemical services so always be open to new products and recommendations from your stylist to best suit your current hair situation.
With the rise in popularity of unicorn and rainbow hair, switching between tones can sometimes be a pain. While permanent color removers have been on the market for years, thankfully new chemical “erasers” have become available to stylists that will remove most if not all of the vivid color in one application. Depending on the integrity of your hair, a more natural fade-out may be the right option for you before overlapping chemicals.
We have a game plan for Felice’s hair the majority of 2019 and how we plan to proceed with our transitions. Because a major goal of ours was to be as bleach-free as possible this year while still making bold changes, we wanted to color with intention and set ourselves up for success when it came to any color removal.
Clients will often switch to heavy shampooing root to ends in attempts to remove color between appointments, but this can definitely be detrimental to the hair if the proper conditioning isn’t done afterward. In our quest for healthy, happy coils, we have continued to evolve Felice’s hair care both in-salon and at home depending on what our next move is. Since Felice is no longer a solid lightener retouch, we wanted to keep any chemicals off of her natural regrowth during the removal process. For the last 3 months, we’ve used the amika Reset Pink Charcoal Scalp Cleansing Oil and Reset Exfoliating Jelly Shampoo just at the root to not only reset and detoxify her scalp but also to help softly remove buildup from our deeper blue toned root shadow.
When it comes to more stubborn or vibrant colors that just won’t fade, the alternative is to use an eraser or remover product. Deposit-only pigments don’t necessarily budge with lightener as most people think, applying bleach can often intensify the pigment and push it further into the hair shaft so a proper remover is necessary. We used an eraser with the lowest volume developer combined with Olaplex on Felice’s mid to ends to push out any remaining tone and clean the canvas for our new look.
Post color service I would always recommend following up with a treatment, our go-to has been The Kure Intense Repair Mask from amika. We place Felice under the dryer for 20 minutes followed by a cold rinse and it’s been amazing!
Watch our accompanying video (above) for more on this first part of Felice’s hair color transformation! And stay tuned for more in this series on our hair color transformation journey.
Felice’s POV on Drunk Weather Music Video Hair Style Looks
I felt like I discovered some hidden potential in my hair while shooting the music video for my song “Drunk Weather!” Never before had I even thought about experimenting with hairbands and styling my curls purposefully under hoodies. Because the concept of the song was about chilling at home, finding new ways to make hair look easy and breezy opened my eyes to a whole new array of hair styles.
Jeffrey’s Pro Tips for Drunk Weather Music Video Hair Styles
When it came to the look and feel of hairstyling for the “Drunk Weather” video, I wanted to keep Felice’s hair more minimal and relaxed shape wise for the most part while still showcasing a bit of our traditional big and wild vibe. It was important that the shapes and styles were effortless while complimenting our wardrobe choices and overall feel of the video.
Hair Accessories
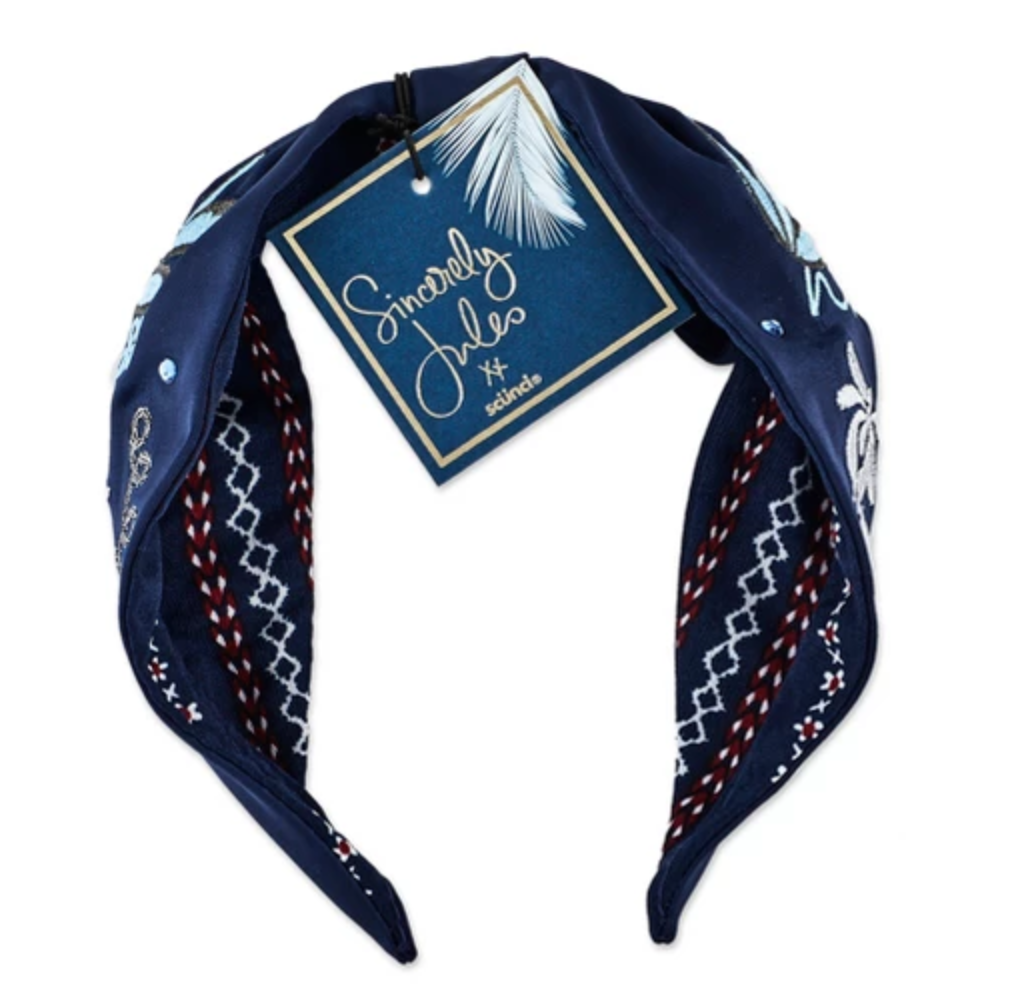
We utilized this opportunity to play more with hair accessories to coincide with the looks
Get the Blue Satin Hair Scarf Felice wore in the music video at HERE
We definitely needed a “Classic Felice” look in the video, which we highlighted with a fabulous blue faux fur coat to complement the blue tones in Felice’s hair.
With the Teddy Romper look, we opted to play off the bear hoodie (we loved the cute ears!) which gave the look a really easy feel. But there was still definitely major attention to detail as I made sure every curl was visible by placing each one by hand for each take.
Another favorite hair look was our quick modern take on the French twist. I created that familiar shape with Felice’s natural texture which added some edge to an otherwise soft style. We enhanced Felice’s natural texture with the Amika Jack of All Curls Curling Kit to give more definition to her curls and finished the look with the Amika un.Done Volume and Matte Texture Spray for a bit more texture and the Amika Vandal Matte Volume Powder for added volume.
For Felice’s Girl Gang in the video, I used the 1 ½” barrel to keep it simple with a natural bend and wave finished with a touch of the texture spray.
What’s your favorite hair look from this music video? Let us know in the comments below!
So you go to the salon, get a fresh cut and color and your hair is looking amazing! But a few days later, you’re feeling like you need another hair service because you have no idea how to take care of your new do. You’re not alone. This is the problem for most of us. At-home curly hair-care is not straight forward. You’re unique hair texture, chemical processing history and the environment you live in are all factors in how you should approach hair care strategy. It is important to discuss your at-home hair care with your stylist and check-in at each appointment to see how your hair is responding to your treatment so you can make adjustments.
PinPoint #1: How often should I wash?
For instance, I only wash my hair about 1x per week, but I used to do several conditioning treatments each time I washed. Soon, I realized that I was over-conditioning!
I wash less frequently because of my curls so I really only need to do deep conditioning 1x per month. Think about it like this, if you’re only supposed to do a deep conditioning treatment 1x per week, but the instructions for that product is basing that frequency on an average of someone who washes their hair 3x per week then if I only wash my hair 1x per week, I should only deep condition every 3 times I wash which would only be about 1x per month. Sorry for the math there, but you’ve got to look at it that way!
So as soon as I stopped over-conditioning, my hair stopped feeling limp and heavy and was back in business. And when I discussed this with Jeffrey, he confirmed all my theories and helped me adjust my at-home curly hair care routine. The moral of this story is to pay attention to what your hair is telling you and make adjustments based on those observations and whether or not you can figure it out on your own, you should always consult your stylist for advice!
Here is a basic overview of my advice for at-home curly hair care that will get curly-haired gals off to the right start in caring properly for their tresses. I mean, you’ve spent all this money to go to the salon and get your hair did, you should spend the time and money to get the right products and use them properly at home!
Establishing a routine with your new products is key and a topic for discussion with your stylist as they are finishing your hair, aka from the time they start shampooing you until they remove the cape at the end to reveal your final look you should be absorbing the information they share. Some items in your arsenal may be for daily use, while others may be weekly or monthly so it’s important to know when to use what and how. I like to show my clients the amount of each product I am using and how to properly apply it.
We, as stylists, want everything to work in harmony for you at home and if you feel as if your stylist isn’t educating you enough, don’t hesitate to ask them questions! It is easy to get caught up chatting with your stylist/client, it’s a valuable relationship, but as important as the gossip is, the maintenance conversations need to be just as important to make sure you’re both on the road to a long, happy hair journey together!
PinPoint #2: Shampooing Like a Pro
Curly hair doesn’t need to be cleansed as frequently as straight hair so when it comes to shampooing, the less you wash your hair, the better! Curly hair is prone to being dry and more fragile, so with excessive shampooing, you’re opening up the cuticle and stripping the hair of its natural oils, drying out your curls even more, which is why it’s so important not to overdo it with washing.
When shampooing, concentrate on rubbing and cleansing your scalp properly with your fingertips to promote hair growth and cleanse the scalp from product buildup without dragging the product through your ends.
Another key is knowing your ingredients and to use products specifically made with your hair type in mind, look for things that are sulfate and paraben-free, as these are two of the harshest ingredients on the hair. We recommend washing 1-2 times a week, but it really comes down to creating your own routine that suits your needs.
One of the most important steps in any curly hair care routine is to replenish moisture into your curls. After shampooing, apply a deep conditioner that suits your hair needs. Is it dry? Pick a moisturizing formula that contains humectants and oils. Is it weak? You’ll need protein with silk amino acids or keratin to restore strength. In the shower use a wide tooth comb to distribute the conditioner evenly and then let the conditioner go to work for a bit.
For a deep treatment, place your hair under a plastic cap or cover it with a towel for 20 minutes. If you’re using a moisturizing conditioner, and your hair has absorbed most of it, you may not want or need to rinse it out. But, if you’re using a protein conditioner, rinsing is absolutely essential as these formulas could cause your hair to become brittle and lead to breakage if left in the hair, too much protein is not a good thing! If you feel as if your curls still need more moisture, opt for applying a moisturizing conditioner after rinsing out the protein conditioner and before styling your hair in place of your leave-in product.
Conditioning Recommendations –
MARCO® COLOR HYDRATE CONDITIONER WITH COLLAGEN COLOR GUARD™
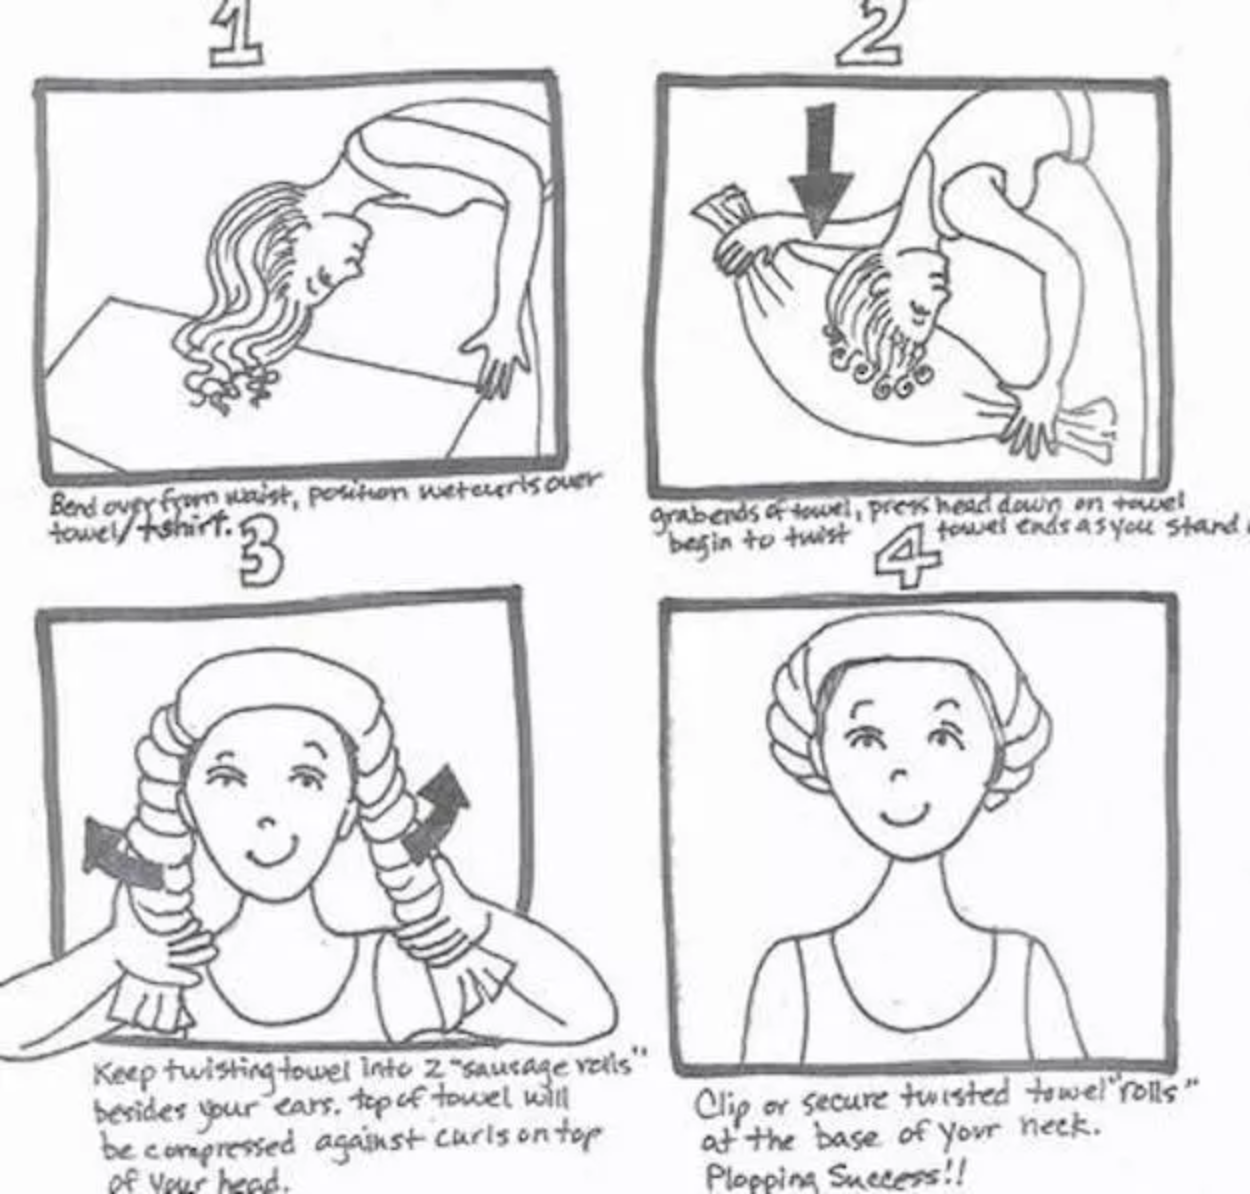
When you’re ready to dry after the shower, ditch the towel and use an old cotton t-shirt that you’ve already got or a micro-fiber towel. Terry cloth towels absorb too much moisture, which curly hair needs and the harsh fiber and rough grooves of a regular towel will ruffle the hair’s cuticle, causing frizz and additional stress to the hair. The t-shirt allows the water to sink into the material and allows it to slide through the hair instead of roughing it up.
Check out the “PLOP” method for more information on using an old shirt for your wet-to-
dry curly hairstyles (we’ll have our own PLOP tutorial coming soon)! No matter what, do not interrupt your curls while they’re drying! Playing with them or running your fingers through them may cause them to frizz up and breaks the shape, which is the first thing you want to avoid.
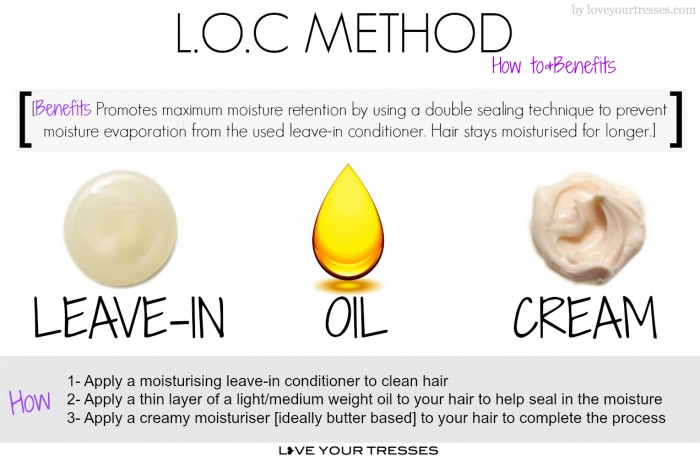
LOC It Up
For many curly hair folks, the order for applying styling aids is leave-in, oil, then curl cream — which is also known as the LOC Method as it’s an abbreviation for leave in conditioner, oil, and cream. By layering your products this way, you allow each of them to penetrate into the cuticle, working as intended for maximum moisture retention in the hair.
For the first step, we recommend applying a moisturizing, leave-in conditioner of your preference, we love the MARCO® ANTI-FRIZZ LEAVE-IN CONDITIONER WITH COLLAGEN COLOR GUARD™!
Next up, apply a thin layer of oil to your hair to help lock in the moisture. Argan Oil is best for dry or frizzy hair, Macadamia Oil for extremely dry or damaged hair and Coconut Oil is great for all hair types, it’s important to test and research what will work best for your hair type.
The final step is to apply a creamy moisturizer to your hair to seal the moisture in with this outer layer. This cream can also provide your curls with definition and hold, so pick something that works well with your hair type as well as lending itself to the style you’re looking to achieve. If your curls require more hold than a creamy moisturizer can give, feel free to finish up with additional styling products to enhance your desired look.
Styling Recommendations –
MARCO® ANTI-FRIZZ LEAVE-IN CONDITIONER WITH COLLAGEN COLOR GUARD™
PinPoint #4: Maintaining Is All About The Right Tools
When it comes to maintaining your curls, there are a few extra steps you can take to keep those coils intact. To start, invest in the best comb possible and ditch the brush altogether. Use a wide tooth comb to detangle section by section after cleansing and applying leave-in conditioner, starting at the ends of your hair working your way up to the root. The least amount of tension and stress on your curls, the better! Much like a terry cloth towel, rough cotton pillowcases can cause your curls to tangle and frizz so swap them out for a silk pillowcase or silk bonnet to keep your curls intact and frizz free!
And that’s our general at-home curly hair care overview. Learn more about Jeffrey and Felice here. We’ll be doing more in-depth articles soon so stay tuned for more tips coming your way. What are some of your at-home curly hair care tips? We’d love to hear them in the comments below!


 shampooing, the less you wash your hair, the better! Curly hair is prone to being dry and more fragile, so with excessive shampooing, you’re opening up the cuticle and stripping the hair of its natural oils, drying out your curls even more, which is why it’s so important not to overdo it with washing.